


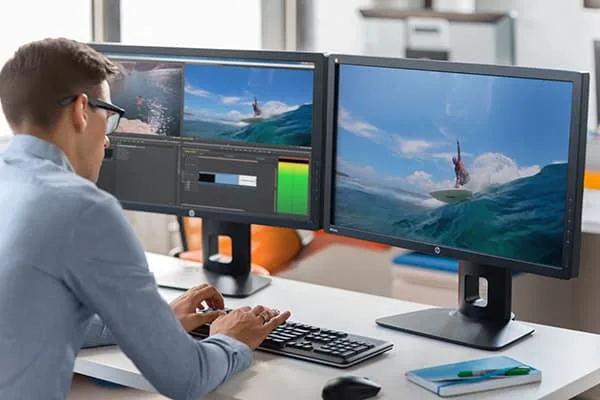
Every creator has a dream to have smooth multitasking and a clear workflow. Don’t worry, dual monitor editing makes it possible. Which gives you more screen space, more freedom, and a significant productivity increase.
But the twist is that it only works efficiently if both monitors actually cooperate. Flickering screens or mismatched colors can quickly turn your workflow into a frustrating experience. Most dual monitor issues have simple fixes.
Luckily, Filmora’s user-friendly dual-monitor mode can be used to handle the timeline and tools on both screens. Thus, your workflow can be kept orderly. Let’s explore the most common dual-screen issues, practical fixes to get the most out of a dual-monitor editing setup.
Part 1: Why Does My Dual Monitor Setup Lag During Video Editing?
Lag is one of the biggest complaints creators can face when working with two screens. Sometimes, you’re ready to adjust a transition, and then suddenly your preview stutters or your timeline crawls. It’s not always your software, but hardware or display settings are usually struggling to keep up.
Here’s why lags show up during editing:
- Your GPU is overloaded: Rendering previews, previewing two displays. Handling real-time effects can push weaker GPUs.
- Mixed Refresh Rates: If one monitor runs at 144Hz and the other at 60Hz, micro-stutters are common.
- Different Resolutions: A 4k screen paired with a 1080p display requires your GPU to work harder than expected.
- Background Apps: OBS, overlays, and browsers drain resources in the background.
The good news? Modern tools like Wondershare Filmora are built to support dual monitoring smoothly. It’s a smart preview engine, and a dedicated dual-screen mode helps distribute tasks more efficiently. With the right setting and a tidy workflow, fixing dual monitor lag is surprisingly simple.
Part 2: Common Dual Monitor Editing Issues and Fixes
Dual monitor editing can boost your workflow. But it also introduces a few common hiccups. Creators often face display detection problems, audio routing issues, and messy cable setups.
Luckily, most of the problems have simple fixes that instantly make your dual-screen editing faster.
Your second monitor refuses to appear or disconnects during an edit.
Why it happen?
- Loose HDMI/DisplayPort cables
- Outdated GPU drivers
- Older or unsupported ports
Fix:
- Reseat the cable securely on both ends
- Switch to DisplayPort for better stability
- Update your GPU drivers (NVIDIA, AMD, Intel)
- Set your displays to Extend, not duplicate
If you want a smooth dual-monitor editing experience, make sure to use reliable cables. Cheap ones cause detection issues more often than you realize.
The one monitor appears to be crisp, while the other appears blurry. The icons or text appear stretched or zoomed.
Why it happen?
- Mixing different resolutions (pair 1080P with 4k).
- Each monitor processes text and UI elements differently.
- Higher-resolution displays require more scaling.
Fix:
- Use each monitor’s native resolution
- Match scaling values (100% or 150%)
- Pair similar screen sizes
When both screens feel visually balanced, Wondershare Filmora panels snap into place more neatly. And you edit with less eye strain.
The timeline playback slows down, the preview stutters, and the effects load slowly.
Why it happen?
- The GPU has to power two displays at once.
- Heavy effects or transitions
- Background apps continue using the GPU
Fix:
- Closed unused apps (Chrome, OBS, Discord overlays)
- Match both monitors’ refresh rates
- Turn on GPU Acceleration inside Filmora
- Avoid pairing 4k screens with budget GPUs
Dual monitors do not cause lag; however, an overworked GPU does. Freeing up system resources is extremely effective.
Your video looks warm on one monitor and cool on the other. Every color edit becomes a game of guesswork.
Why it happen?
- Each monitor uses a different color profile out of the box.
- Auto-brightness adjusts color unpredictably.
- IPS, VA, and TN panels display color differently.
Fix:
- Turn on sRGB mode
- Choose IPS panels for accurate colors
- Disable auto brightness and dynamic contrast
- Calibrate both displays using built-in presets or free tools
For creators who color grade in Filmora, a matched display ensures that your final video looks consistent throughout.
The audio abruptly switches to your monitor speakers or goes out of sync.
Why it happen?
- Frequent device switching causes sync delays.
- Audio drivers struggle with multiple active outputs.
- Windows switches output when a new device connects.
Fix:
- Set your main speaker as the default audio device.
- Disable “audio through monitor” in Windows.
- Stick to one output device instead of switching often.
Monitors with built-in speakers cause confusion in Windows audio routing. Keeping things simple will help you avoid most delays.
Cables everywhere, little desk space, and awkward monitor placement.
Why it happen?
- Using bundled or cheap cables that tangle easily.
- No cable routing system under the desk.
- Different cable lengths create uneven slack and clutter.
Fix:
- Use a dual-arm VESA mount for better movement.
- Label your cables (HDMI 1, HDMI 2, HDMI 3)
- Use velcro ties, desk grommets, or cable sleeves
A clean desk isn’t aesthetic, but it genuinely improves your editing pace and reduces the chances of accidental disconnections.
Laptop and monitor configurations result in scaling issues, inconsistent color, and decreased performance.
Why it happen?
- Laptops and monitors use different color profiles.
- Limited port bandwidth reduces performance.
- The integrated GPU struggles with dual screens.
Fix:
- Close the laptop lid and use external monitors only
- Set the laptop screen as secondary
- Connect through USB-C or DisplayPort rather than adapters
When given a single, stable connection, laptops produce smooth visuals.
Once you fine-tune your display settings, GPU performance, workspace layout, and connection setup, your dual-monitor editing experience becomes dramatically smoother.
Part 3: Filmora Dual Monitor Setup: The Smart Way to Edit Faster
If you want a dual-screen workflow without technical headaches, Wondershare Filmora makes it incredibly simple. Here is how easy it is:
Step 1: Connect your Monitors
Connect your second monitor to your computer and let your setup come to life. Head into your system’s display settings and make sure that both screens are aligned and arranged correctly.
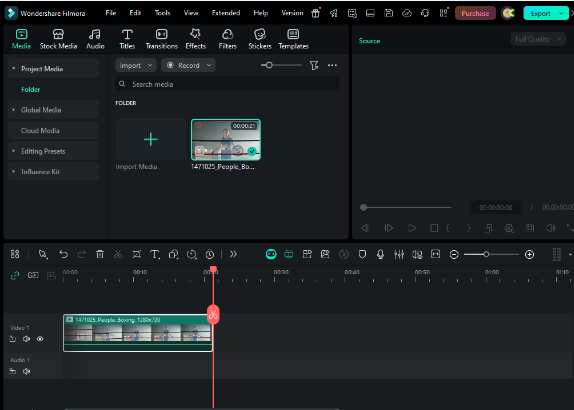
Step 2: Launch Filmora & Import clips
Start by opening Filmora and creating a new project. Then, bring in your video clips and simply drag them onto the timeline to get things rolling.

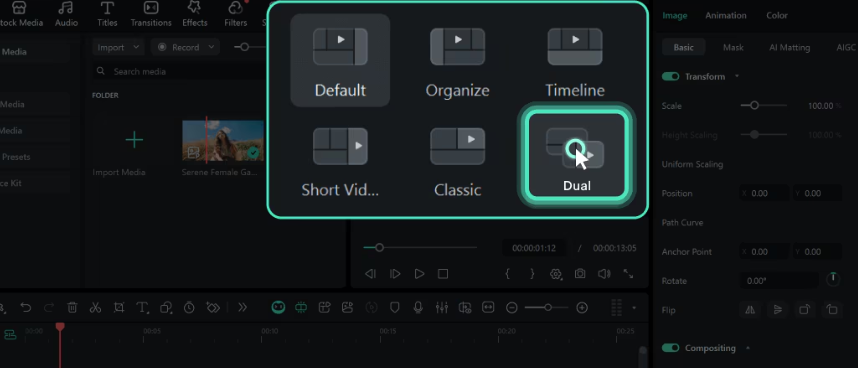
Step 3: Choose your Layout
Filmora gives you preset dual-monitor layouts, or you can build your own by simply dragging panels where you want them.

Step 4: Move the Timeline Window
Head over to the preview area and grab the Timeline Monitor window. You can drag it to any spot that feels comfortable for you.

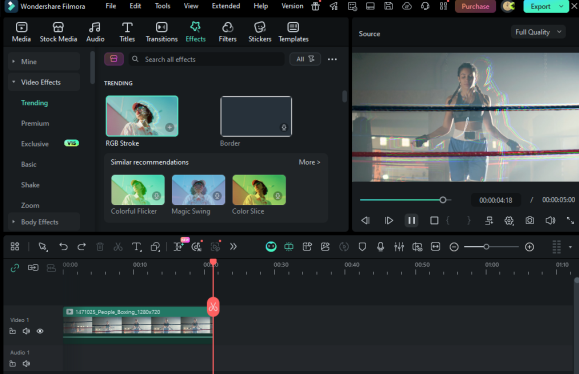
Step 5: Move the Source Monitor Window
Next, grab the Source Monitor window and place it wherever it works best for you. You can keep it beside the Timeline Monitor or move it to another spot.


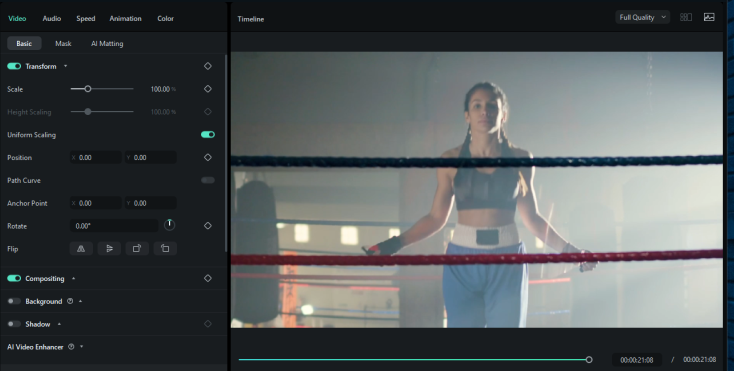
Step 6: Preview and Edit
Once both monitor windows are set just the way you like, you can preview and edit side by side without missing a beat. And when everything looks perfect, just tap the Export button in the top-right corner to save your video.

This setup provides you with the advantages of both: a preview without any distraction on one display and a big timeline on the other. It is designed to make creative work feel effortless.
Conclusion
Dual monitor editing can dramatically improve your workflow. But only if both screens work together seamlessly. Once you fix common issues like color mismatches, lag, and scaling issues. Your entire workspace feels faster and so much easier to create.
And when you’re ready to take things even further, Wondershare Filmora offers an effortless way to perform dual-monitor editing through its user-friendly dual-display mode.
If you want to have a more clever and orderly editing setup, it is now the ideal moment to adjust your dual monitors and discover the totality of your creative flow.